
Conda
Contents
Usage
Using Conda with Python
Using Conda with R
Conda is an open-source package management system and environment management system that runs on Windows, macOS, Linux and z/OS. Conda quickly installs, runs and updates packages and their dependencies. Conda easily creates, saves, loads and switches between environments on your local computer. It was created for Python programs, but it can package and distribute software for any language.
Minerva has transitioned from Anaconda to Miniforge to ensure a software ecosystem that is fully compliant and flexible. Please refrain from using the Anaconda channel for the reasons outlined below.
- Licensing and Cost Compliance
Recent changes to Anaconda’s licensing model restrict free usage in certain organizational and commercial settings. Miniforge is fully open-source and avoids potential licensing risks or fees. - Open-Source Ecosystem (conda-forge)
Miniforge uses the conda-forge channel by default, which is community-maintained, transparent, and widely trusted for up-to-date packages. - Lightweight and Minimal Installation
Unlike Anaconda, which ships with many preinstalled packages, Miniforge provides a minimal base environment. This reduces bloat and gives users full control over installed packages.
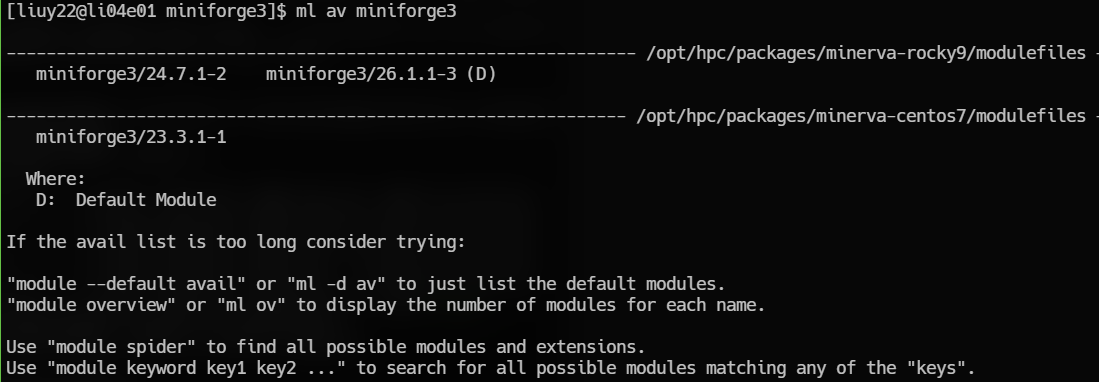
The conda package and environment manager is included in all versions of miniforge3. Many versions of miniforge3 are available to use on Minerva. To see a list of installed versions of miniforge3 on the cluster, use Lmod’s spider command:
Usage
When creating an environment, conda will download large amounts of installation tarballs to the package cache directory. The default is “~/.conda/pkgs” in /home directory, however on Minerva, user’s home directory has 30 GB quota. Therefore, instead of using this default setting, it is recommended to redirect the downloaded package cache directory to a different location, which can be specified in the “~/.condarc” file. Below steps listed steps for redirecting the package cache location:
Edit conda user config file: “~/.condarc” to redirect the package cache and env directory. For example, after opening “~/.condarc”, add the following lines:
envs_dirs:
- /sc/arion/work/your_username/test-env/envs
pkgs_dirs:
- /sc/arion/work/your_username/test-env/pkgs
If you do not have a “~/.condarc” file, use the command below to create one:
$ touch ~/.condarcBefore trying to create a conda virtual environment, do a module purge to clean up the current environment:
$ module purgeThen load an miniforge3 module. For example:
$ module load miniforge3/26.1.1-3Check conda information. If conda is available, you will see:
$ conda info
…
     active environment :
            shell level : 0
       user config file : /hpc/users/[user_name]/.condarc
 populated config files : /hpc/packages/minerva-rocky9/miniforge3/26.1.1-3/miniforge/.condarc
                          /hpc/users/[user_name]/.condarc
          conda version : 26.1.1
    conda-build version : not installed
         python version : 3.13.12.final.0
                 solver : libmamba (default)
       virtual packages : __archspec=1=sapphirerapids
                          __conda=26.1.1=0
                          __glibc=2.34=0
                          __linux=5.14.0=0
                          __unix=0=0
...
          package cache : /hpc/packages/minerva-rocky9/miniforge3/26.1.1-3/miniforge/pkgs
                          /hpc/users/[user_name]/.conda/pkgs
       envs directories : /hpc/packages/minerva-rocky9/miniforge3/26.1.1-3/miniforge/envs
                          /hpc/users/[user_name]/.conda/envs
    temporary directory : /tmp
               platform : linux-64
...
Also make sure the envs and package cache directories have been redirected to the correct directory.
Next is to create a conda virtual environment. For example, creating a conda environment called “test” by:
$ conda create -n testThe conda environment should then be activated before installing packages:
$ source activate testThe name of the virtual environment will also show in front of your username in the prompt:
(test) [user_name@li04e03 ~]$Then you can install packages using the command:
$ conda install -c channel_name package1=version package2=versionChannel name and package version are optional.
If you want to leave your virtual environment, simply run:
$ conda deactivateOther useful conda commands:
Checking current and available conda environment:
$ conda info –-envsCheck installed packages:
$ conda listUpgrade and uninstall packages inside a conda environment:
$ conda upgrade/update package1 package2
$ conda uninstall/remove package1 package2
Remove a conda environment:
$ conda env remove -n env_nameUsing Conda with Python
Make sure to unset PYTHONPATH and PYTHONHOME in case they are specified previously:
$ unset PYTHONPATH
$ unset PYTHONHOME
The version of Python in the conda environment can be specified when creating the conda environment, for example, specify python 3.6 to be used in the environment “test”:
$ conda create –n test python=3.6Or install python after creating the conda environment:
$ conda install python=3.6 Using Conda with R
Make sure to unset R_LIBS and R_LIBS_USER in case they are specified previously:
$ unset R_LIBS
$ unset R_LIBS_USER
Also, you might need to comment lines related to these variables in .Renviron and .Rprofile file in your home directory.
The version of R in the conda environment can be specified when creating the conda environment, for example, specify R 4.2.0 to be used in the environment “test”:
$ conda create –n test r-base=4.2.0 Or install R after creating the conda environment:
$ conda install r-base=4.2.0 When using conda to install R packages, you will need to add r- before the regular package name. For instance, if you want to install rbokeh, you will need to use:
$ conda install r-rbokeh or for rJava, type:
$ conda install r-rjava For more information about using conda, please click here.