
Scientific Computing and Data / High Performance Computing / Documentation / Long-Term Data Archive: TSM
Long-Term Data Archive: TSM
Contents
Archiving Data
Access TSM with GUI
Access TSM with Command Line
Access Archived Files
Frequently Asked Questions
Archiving Data
Important data stored on Minerva can be protected by archiving the data in the IBM Tivoli Storage Management (TSM) system (renamed as Spectrum Protect after v8.1.21.0) installed on a Minerva server.
The TSM system will create two long-term tape copies of your data. One copy will be stored in the IBM tape library that is part of the Minerva complex and be available for rapid recall; the second copy will be stored off-site in a secure data vault for disaster protection. Data on both copies will be encrypted to deter unauthorized access.
Minerva Archival Storage Policy
Please review the Minerva TSM Archival Policy V1 before your TSM activities click here
Data Retention Policy
The archived data will have a retention time of 6 years and will then be deleted, please check the expiration date of your archived files. This is the responsibility of the user!
How to Access TSM
TSM client or Spectrum Protect client v8.1.21.0 is installed on all login nodes.
In the TSM system, archived data is organized by nodes. A node is a logical abstraction and may correspond to various physical entities. On Minerva, each user is treated as a separate node, and the node identity is defined by the user’s ID (userid).
The TSM system can be accessed via either a GUI or the command line. The command line mode is particularly useful when archiving large datasets in that it can be issued using the screen command. The screen can then be detached and the command can run unattended for the hours it may take to archive the data.
Access TSM with GUI
Access TSM with Command Line (recommended)
General suggestions
Tar small files before archive.
Because all the files that are archived are entered into a database, to prevent overflowing this database we ask that you first use the tar command to create a unix tar archive of bundles of small files and then archive the tar file to TSM. For information about tar, see the man pages (man tar) on Minerva or check out this link.
Command Line and Screen is recommended for large data archiving or retrieval.
Using the graphical interface for large data archiving or retrieval is not recommended, as it requires keeping the interactive session open until the process completes. Instead, it is advisable to start a screen session and use command-line tools to perform the archiving. This allows you to safely detach from the session while the operation continues in the background.
Long retrieval time is expected.
Due to the large volume of archived data and limited tape slots in the TSM library, most tapes are stored in cabinets rather than loaded in the library. When you issue a retrieval request, our operators are notified by email and will manually locate and load the requested tape into the library. This manual process typically takes up to 1.5 hours, during which the request may appear as “[ – ]” with no visible progress.
Once the tape is loaded, the TSM library will automatically mount it and begin data transfer, which proceeds at a reasonably fast rate.
Please note that tape check-in errors may occur when multiple retrieval requests are processed simultaneously. If you receive an error such as “data is unavailable,” submit a support ticket and we’ll assist you promptly.
Warning: If you choose to automatically delete files after archiving and later delete the corresponding archive object from TSM, the data will be permanently lost and cannot be recovered. Use this option with extreme caution.
Access TSM with GUI
To access the system via the X-Windows GUI, enter the dsmj command. dsmj requires java, so the java module will need to be loaded:
 $ module load java
 $ dsmj -se=userid
The following window will be displayed:
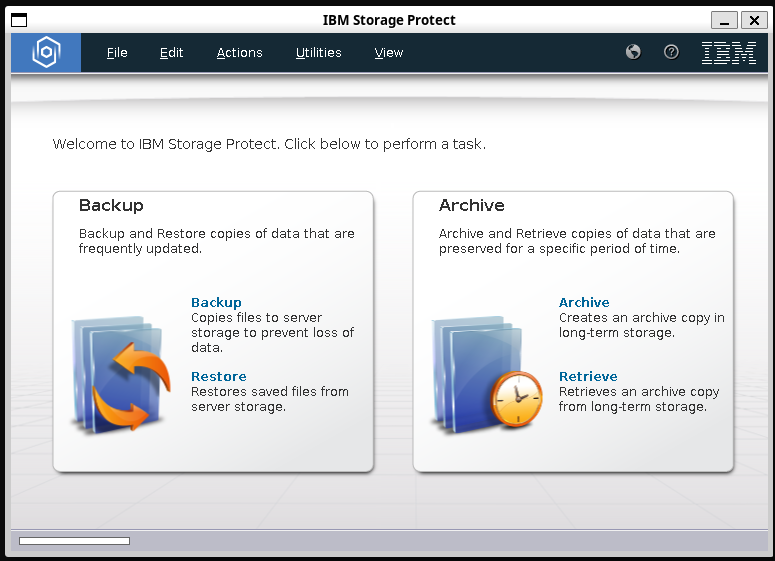
Archive by GUI
We are not supporting backup so ignore the top panel of the display. If you click on “Archive“, the following screen will appear. Files are displayed in the standard descending tree format and you can drill down to any sub-directory or file. When you get to the last directory, you click on the “folder” icon to expand the list of files.
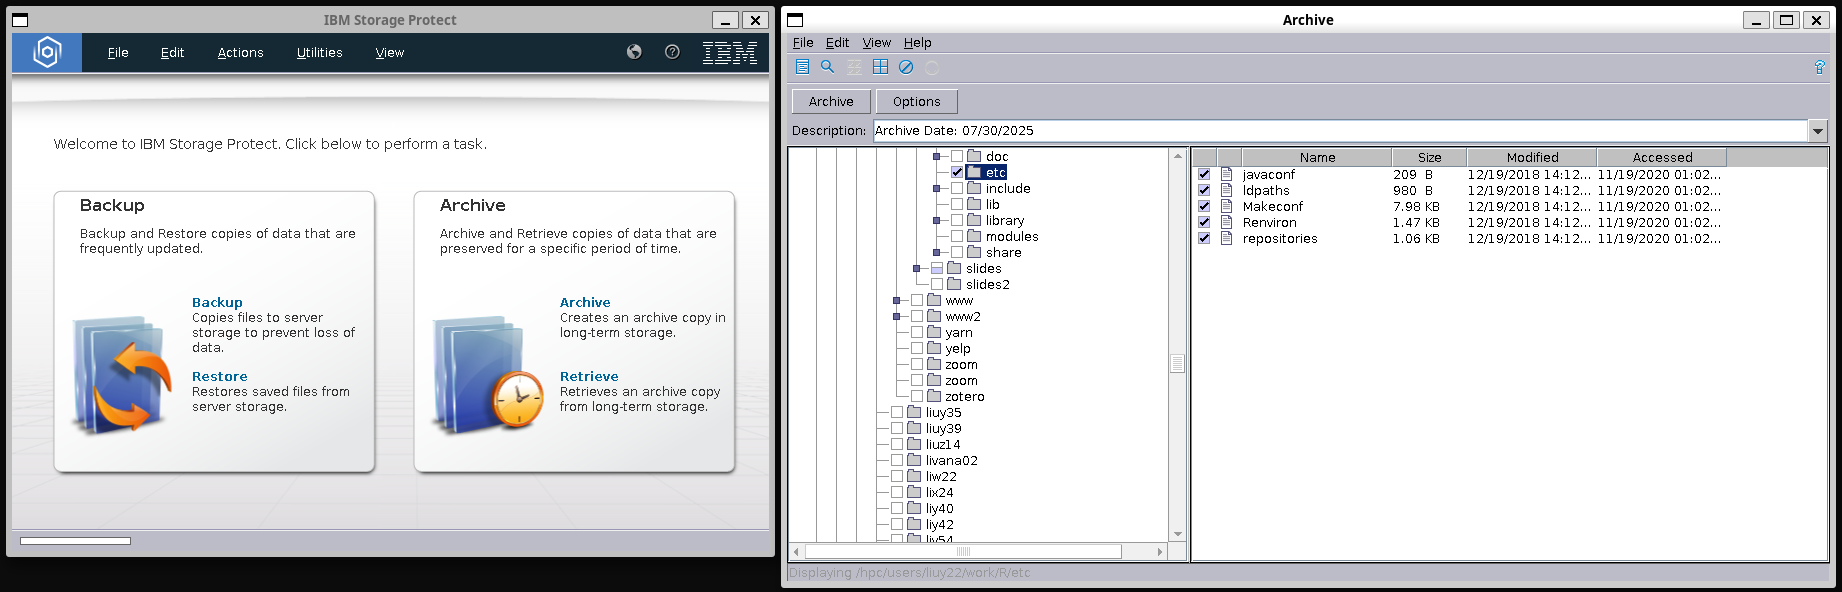
To select files to be archived, click the box nest to the file name. To select the entire sub-directory, click on the box next to the sub-directory you wish to archive. (the boxes next to each file will automatically be filled in).
You can set the “description” of the archive package by entering your description into the text box at the top of the screen.
Once files are selected and you have annotated your archive by means of the “description” text box, click on the “archive” button and the operation will commence.
Retrieval by GUI
To retrieve files, the operation is the same except that you would click on Retrieve. Note that instead of the hierarchical display being by file, the display will be by “description“. Drilling down on one of the archive packages will display the file structure of what was archived.
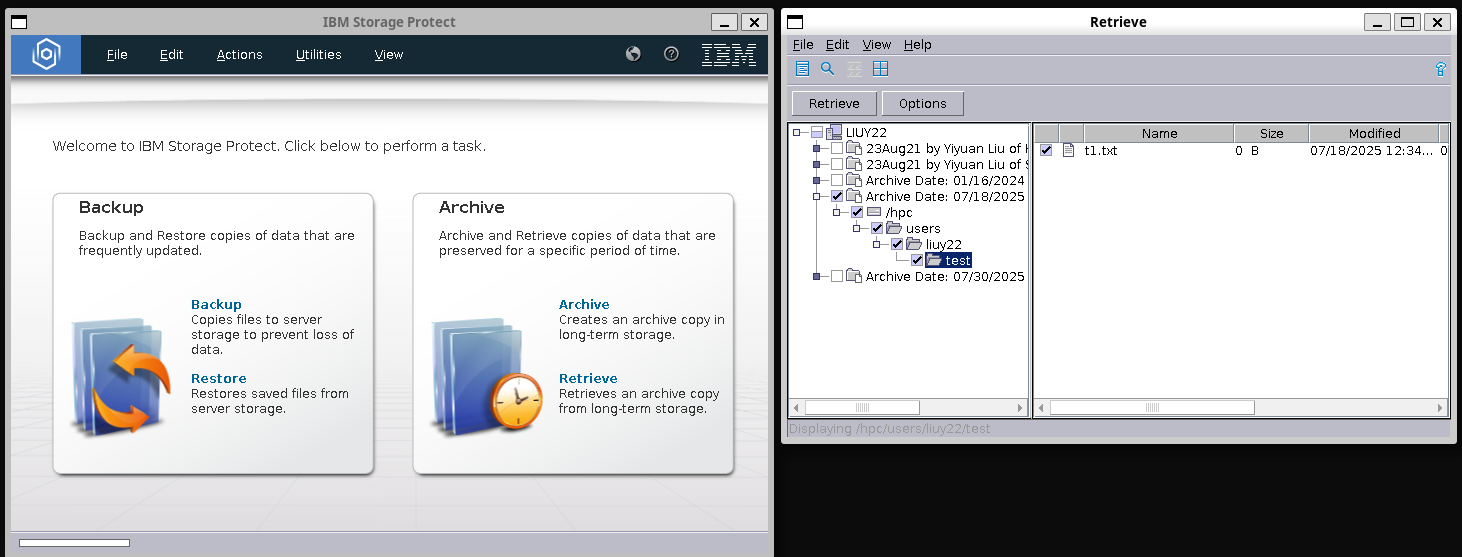
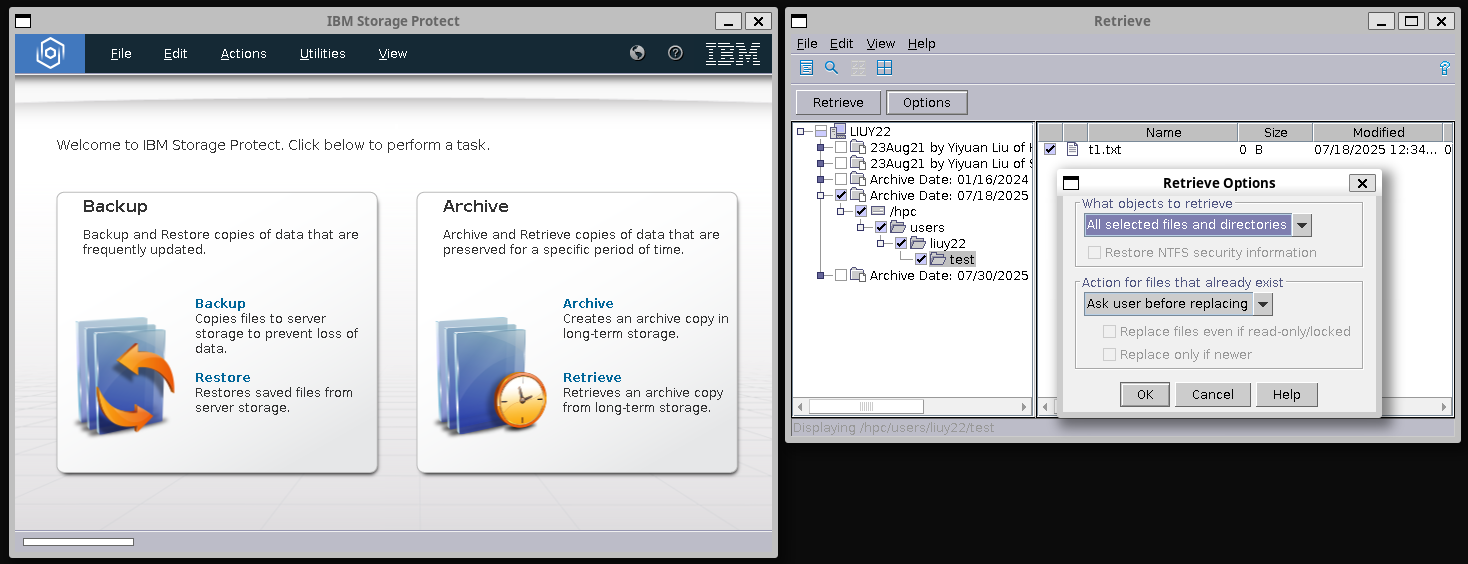
Then click “retrieve” to continue.
Delete Archive by GUI
From the main screen, select Utilities > Delete Archive Data:
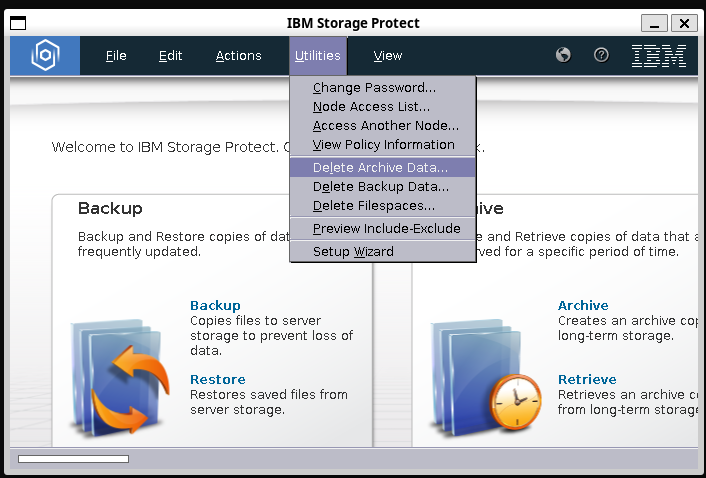
The hierarchical display of the archive data will appear as in Retrieve, but the option will be only to delete.
Access TSM with Command Line
The command to access the TSM system is: dsmc. The option needed to specify your node name is: -se=userid. You must always indicate your node (user name) on the command line or the command will fail.
You can either issue the command through your login shell, for example:
$ dsmc q archive -se= userid /home/proj1/ -sub=yes
or you can launch the spectrum protect (TSM) shell and issue the command there:
$ dsmc -se= userid
Protect> q archive /home/proj1/ -sub=yes
Caution:
By default, the dsmc command operates only within the current file system. For example, if you are in the home file system (/hpc/users), wildcard patterns will not match files in the scratch file system, and vice versa. To access files in a different file system, you must explicitly specify the full path to the desired directory.
Example:
Assume these files exist:
/hpc/users/minerva_user/a.file
/hpc/users/minerva_user/b.file
/sc/arion/scratch/minerva_user/c.file
/sc/arion/scratch/minerva_user/d.file
If one is in their home directory and specifies the file name as *, only file a.file and b.file will be seen.
If one is in the scratch directory and specifies the file name as "/hpc/users/minerva_user/*", again, only a.file and b.file will be seen.
Caution:
TSM distinguishes between treating a directory file as a directory or treating it as a file. When a file is archived, the parent directory file is also archived.
In general, if a directory is to be considered a directory, then a slash should follow the name. E.g.:
/hpc/users/m_user/all_my_data is the file all_my_data. Whether it is a directory or not it will be treated as a simple file.
/hpc/users/m_user/all_my_data/ is the directory all_my_data and all the files in the directory.
This makes a difference when you ask the dsmc commands to work with all the files below the directory with the -sub option. In the case with no slash, -sub has no effect since you are talking about the file; with the slash, -sub will act on the files below the directory name. See example below.
The various commands to the system are introduced below by way of examples for screen, archive, query, retrieve, delete
The screen command is particularly useful here when archiving large files. For information on how to use the screen command check the man page (man screen).
Some simple, elementary examples:
screen dsmc archive -se=userid big_directory -sub=yes -description="Irreplaceable data 1 Apr 2012"
After starting a new screen session, you can run the desired command—whether it begins executing immediately or is momentarily blocked by TSM while waiting for resources. To detach from the session and let the process continue in the background, press Ctrl-a followed by d. You can then continue working or log out entirely.
Alternatively, you can start a screen session by simply typing screen, which opens an interactive shell. From there, you might run a few setup commands before launching dsmc. As before, press Ctrl-a d to detach the session.
To reattach to the screen session later, use screen -r.
1. Archive (1) file in /home/proj1 directory called file1.txt
dsmc archive -se=userid "/home/proj1/file1.txt"
2. Archive file file2.txt in /home/proj1
dsmc archive -se=userid "/home/proj1/file2.txt"
3. Archive all files that end with txt in directory called /home/proj1
dsmc archive -se=userid /home/proj1/*.txt
Note: quotes are necessary only if there is white space in the name of directory/file. * is a wildcard
/home/proj1/ by using a single command:
dsmc archive -se=userid /home/proj1/ -sub=yes
dsmc archive -se=userid /home/proj1 -sub=yes will archive only the directory entry for /home/proj1—not its contents—because it lacks a trailing slash. Without the slash, TSM treats /home/proj1 as a file rather than a directory.
(cd to “/home/proj1” directory first)
LINUX> cd /home/proj1
(invoke TSM client)
LINUX/home/proj1> dsmc -se=userid
(issue a TSM command: will archive file file1.txt from the current directory /home/proj1)
Tsm> archive file1.txt
(quit TSM)
Tsm> quit
dsmc archive -se=userid /home/proj1/file1.txt -deletefiles
dsmc archive -se=userid /home/proj1/file1.txt -description=”Project 1 file June EOM”
Archive Date:current_date
 Size  Archive Date - Time    File - Expires on - Description
          ----  -------------------    -------------------------------
 32,768  B  09/26/12  09:27:56  /gs01/scratch/fludee01/eclipse 09/27/17  Archive Date: 09/26/12
 32,768  B  09/26/12  14:39:50  /gs01/scratch/fludee01/charyprob 09/27/17  Archive Date: 9/26/12
 32,768  B  09/26/12  10:56:05  /gs01/scratch/fludee01/zhangtest 09/27/17  test2
 32,768  B  09/26/12  11:00:57  /gs01/scratch/fludee01/packages 09/27/17  packages as of : 09/26/12
 32,768  B  09/27/12  11:37:27  /gs01/scratch/fludee01/packages 09/28/17  Archive Date: 09/27/12
/home/proj1/
dsmc q archive -se= userid /home/proj1/ -sub=yes
file1.txt has been archived
dsmc q archive -se=userid /home/proj1/file1.txt
dsmc q archive -se=userid -description="Important test*" "*"
file1.txt from directory /home/proj1 and stored it in its original location.
dsmc retrieve -se=userid /home/proj1/file1.txt
 Select an appropriate action
        1. Replace this object
        2. Replace all objects that already exist
        3. Skip this object
        4. Skip all objects that already exist
        A. Abort this operation
 Action [1,2,3,4,A] : 1
 Retrieving             8    /usr/local/bin/file1.txt [Done]
file1.txt from directory /home/proj1 and save to a different directory /home/proj2 with different file name file2.txt
dsmc retrieve -se=userid /home/proj1/file1.txt /home/proj2/file2.txt
dsmc retrieve -se=userid -description="Important test45" "*" -sub=yes
/home/proj1 and save to a different directory /home/proj2
dsmc retrieve -se=userid /home/proj1/ /home/proj2/ -sub=yes
file1.txt
dsmc delete archive -se=userid "/home/proj1/file1.txt"
dsmc delete archive -se=userid "home/proj1/" -sub=yes
dsmc delete archive -se=userid -description="not-so-important study" "*" -sub=yes
dsmc delete archive -se=userid -description="not-so-important study" "*" will delete nothing.
Access Archived Files
Table of Contents:
Grant access to other user using GUI
Access other user’s data using GUI
Grant archive access to other user(s) using the Command Line
Access other users’ archived files using Command Line
Grant Access To Other User Using GUI
Once on a login node, enter the following commands.
$ module load java
$ dsmj -se=userid
On the main page, go to Utilities , Node Access List, it will open up a window which shows you who has the access privileges to your node.
To add new users to your access list, click Add on the right hand side of the panel. Select Archived Objects on Permit Access to. Add the userid to the column Grant Access to Node and leave * on the User column. If you only want to grant the access of some certain files/directories, you can select that file/directory on the Filespace and Directory column, or fill in the Filename and Include subdirectories part.
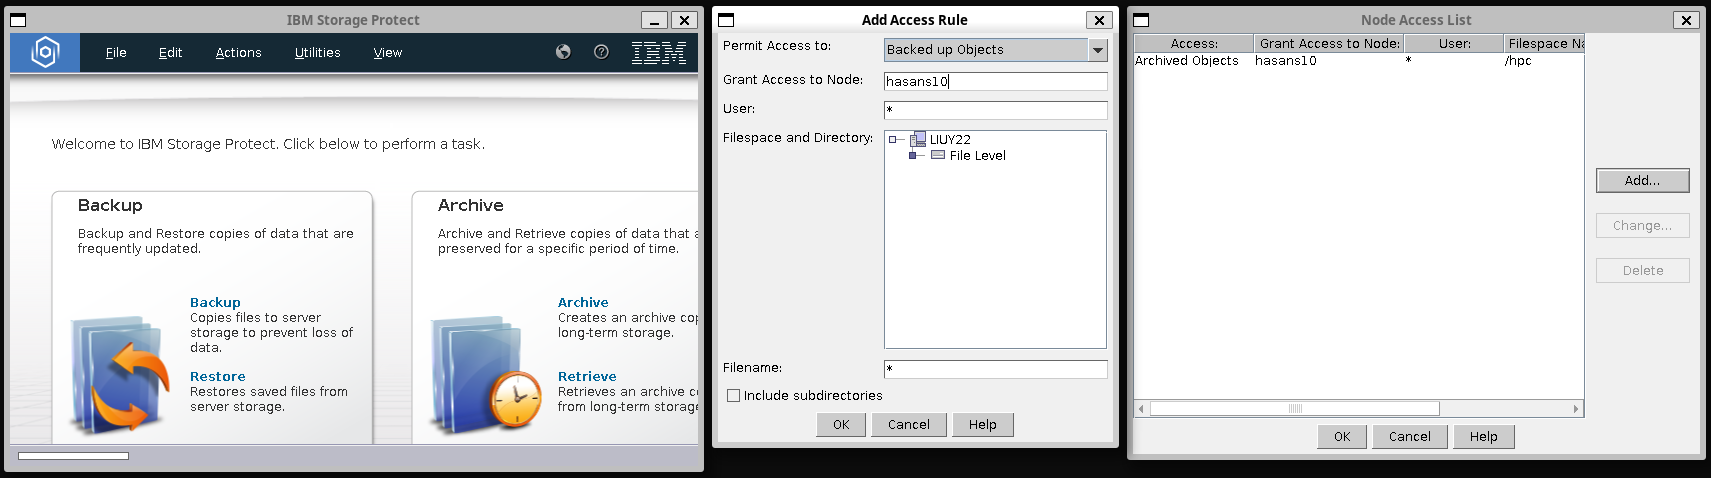
You can view/change/delete these access rules on the Node Access List window.
Access Other User’s Data Using GUI
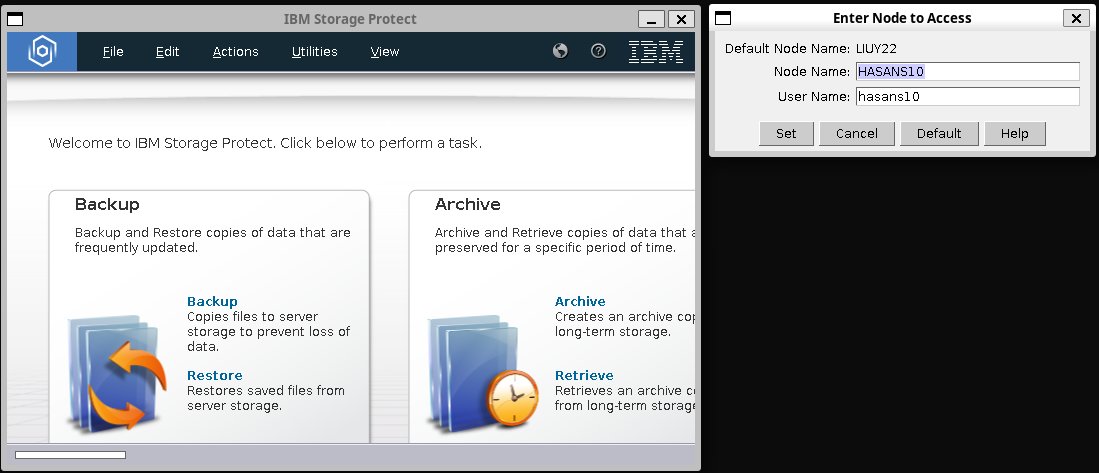
After you launched the GUI of TSM (see above), on the main window, go to Utilities, Access Other Node.
On the popped-up window, enter userid that you would like to access on both column Node Name and User Name. Click Set and you can navigate and retrieve as normal.
Grant Archive Access To Other User(s) Using the Command Line
The TSM command to grant access to your files is “set access“. The syntax for “set access” is:
Set Access Archive/Backup $filespect $nodename $userid
If the parameter $userid is omitted, by default it points to all users (*).
To grant user2 access to your archived files:
$ dsmc -se=my_userid
Protect> set access archive * user2
ANS1148I 'Set Access' command successfully completed
To grant user2 access to some of your archived files:
$ dsmc -se=my_userid
Protect> set access archive path-to-file user2
To query who can access your files:
$ dsmc q access -se=my_userid
Type     Node        User        Path
----     ----------------------------
Archive  user2       *           *
To delete the access rules, for example:
$ dsmc delete access -se=jiangd03
Index Type     Node        User        Path
----- ----     ----------------------------
  1   Archive  THAKUB02    thakub02    /hpc/users/jiangd03/*/*
  2   Archive  THAKUB01    *           /hpc/users/jiangd03/find-active-user-mail/*
  3   Archive  THAKUB01    *           /hpc/users/jiangd03/find-active-user-mail/*/*
Enter Index of rule(s) to delete, or quit to cancel:
This command will list all the access rules by index. You can enter the index number if you want to delete that rule.
Access other user’s archived files using command line
After the access is granted by user1, you can query and retrieve user1‘s archived file:
$ dsmc q archive -se=my_userid -fromnode=user1 -fromowner=user1 path-to-file

$ dsmc retrieve -se=my_userid -fromnode=user1 -fromowner=user1 path-to-file path-to-my-dir
Note: After retrieval, the owner and group of the retrieved file will automatically changed to be the same as retriever.
Frequently Asked Questions
Can I use TSM for backup
How to access other users’ archived files
Error message with Permission Denied
Error message with file currently unavailable on server
Error message with file write protected and unable to retrieve to the disk
Error message with exceeded maximum number of mount points
Can I keep my archived data over the 6 years’ retention time?
For a more extensive discussion of using TSM, see IBM Spectrum Protect Manual
Can I use TSM for backup
We don’t recommend users to use TSM for Backup unless it is really really needed for your work. TSM archive can meet the needs of most users, to keep copies for the data that is not needed for a while. Please use TSM archive when you can. If you do have important files constantly changing and you really need to backup them, please complete the Minerva TSM Backup Request Form. We will contact you to discuss it. Otherwise, if you run TSM backup without making a request, the process will be killed.
How to access other users’ archived files
Follow this link for more information.
What to do if you receive Permission Denied
During retrieval you may encounter the following error message: ANS1590W I/O error writing file attribute: security.selinux for: /dir-to-file/file. errno = 13, Permission denied.
This error is due to TSM failed to write some extended security information for your file. We have that feature turned off. Same error message may also appear from untarring tarballs that you imported from another installation. Despite this error message that TSM throws, the retrieval will continue and the data will not be impacted.
Error message with file currently unavailable on server
Users are able to query the archived file, but the retrieve fails with error message:
11/14/17 18:03:31 ANS4035W File ‘filename’ currently unavailable on server.
This is due to either the tape information is not correct or it did not load into the Library correctly, please send in a ticket and we will fix it for you.
Error message with file write protected and unable to retrieve to the disk
Users retrieving a file but get error message stating that the file is “write protected” and the file is unable to write to the designated directory. TSM may ask for options, but choice with “Force an overwrite for this object” does not work. User may also specify a different destination directory for retrieval, which the user have the write permission, but same error exits.
This normally happens due to the write permission bit is taken away for the file when it is archived. Normally, this kind of file can be written to /hpc and /tmp, but not GPFS file systems such as /sc/hydra since GPFS has high security settings on the top layer. It is not possible to change the file permission once it is archived but we can provide workaround.
If the file is small in size, please check the space in your home dir (/hpc/users/userid), or /tmp directory on the login nodes (use “df -h” and look for available size in “/” dir). Retrieve to these two directories first and move out to your desired directory. Please constantly monitor the size of the /tmp and do not use over 70%.
If you have a large size of file to retrieve and can not fit in these two directories, please send in a ticket and the admins will retrieve for you.
Error message with exceeded maximum number of mount points
Users may get following error using TSM:
ANS0326E This node has exceeded its maximum number of mount points
This is due to that a maximum of 4 TSM connections are allowed at a time for each node/user. Both dsmc and dmsj commands counts for the TSM connection. Please limit your concurrent TSM connection to 4 and the error will go away. You may also want to check whether there is orphan TSM process from your earlier tsm activities. Terminate this orphan process will also free up more TSM connections.
Can I keep my archived data over the 6 years’ retention time?
For files needed past their expiration date, we suggest you retrieve those files and archive them again. This is good practice for two reasons: