
Scientific Computing and Data / High Performance Computing / Documentation / Python and Jupyter Notebook
Python and Jupyter Notebook
Contents
Python
Jupyter Notebook
Python
Python is an interpreted programming language that has become increasingly popular in high-performance computing environments because it’s available with an assortment of numerical and scientific computing libraries (numpy, scipy, pandas, etc.), relatively easy to learn, open source, and free.
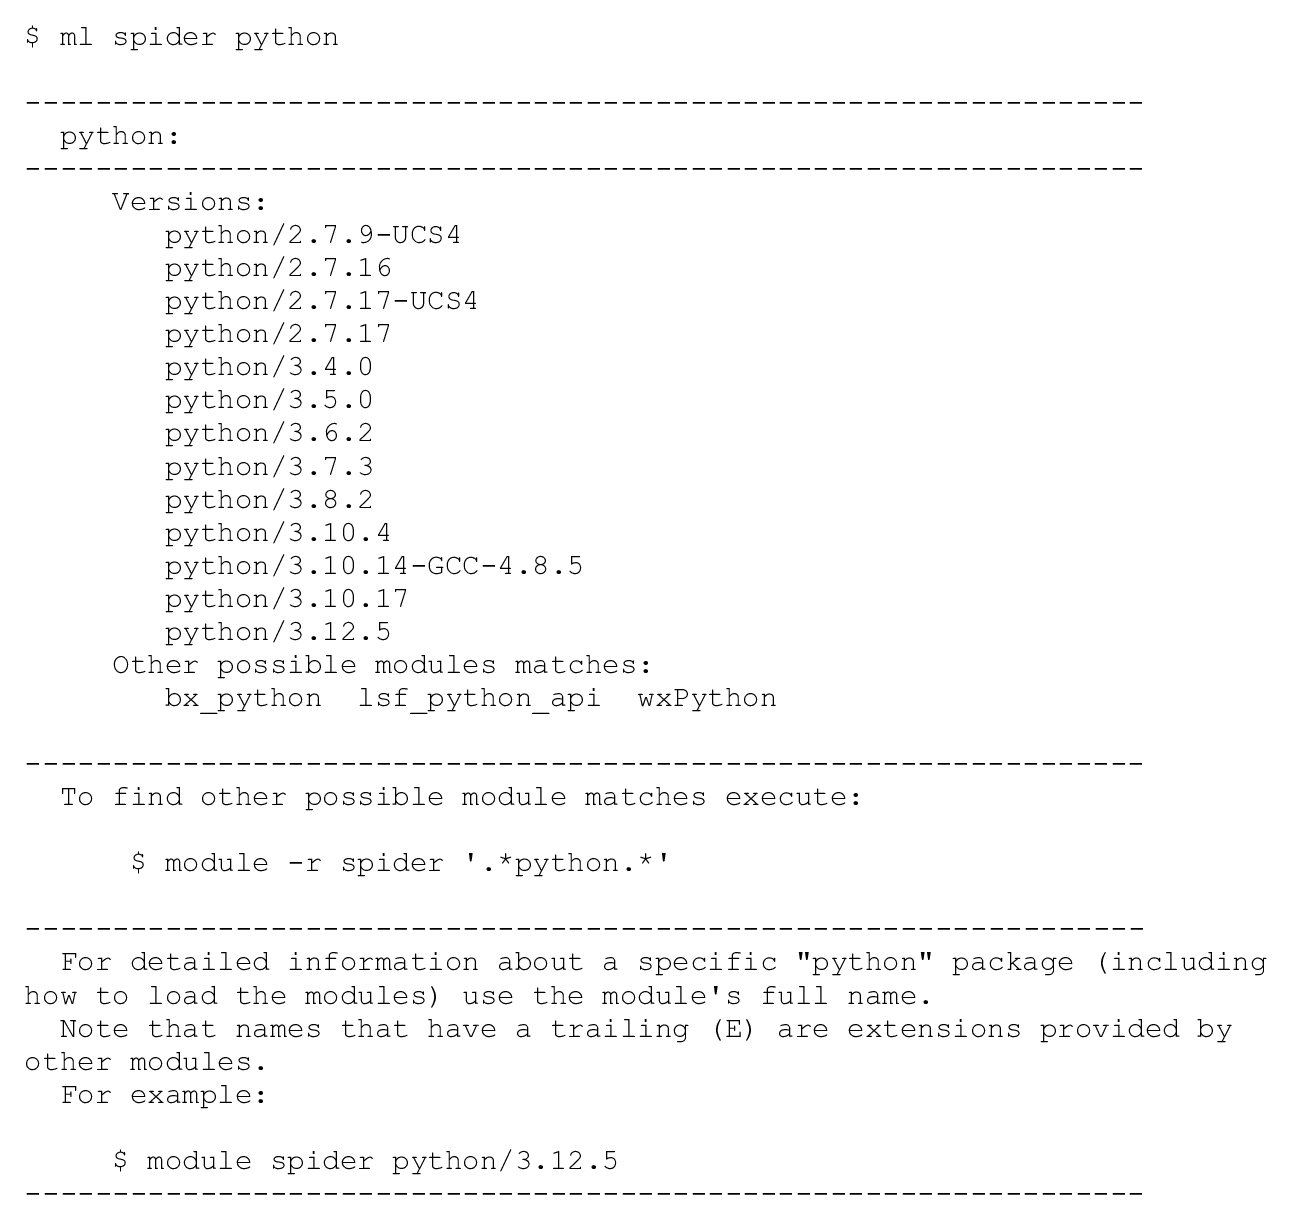
Many versions of Python are available to use on Minerva. To see a list of installed versions of Python on the cluster, use Lmod’s spider command:
Usage
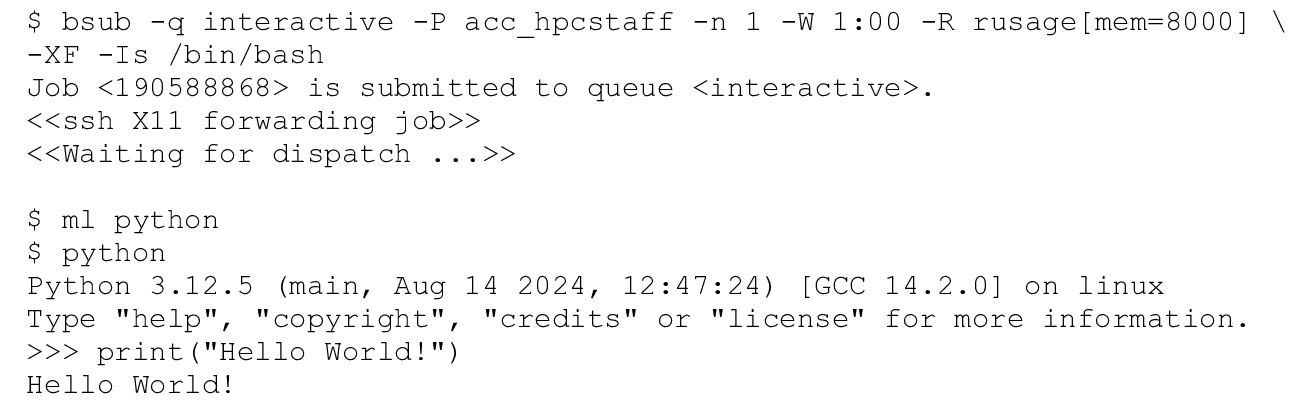
Python may be run either interactively, or as a batch process reading commands from a script file. To run Python interactively, open an interactive session by submitting a job to the interactive LSF queue. Then simply execute the Python command. After the terminal is launched in the interactive mode, users can run Python commands at the prompt:
Installing New Packages Locally
There are multiple ways to install and manage Python packages locally. Here we present several of them in detail below as examples:
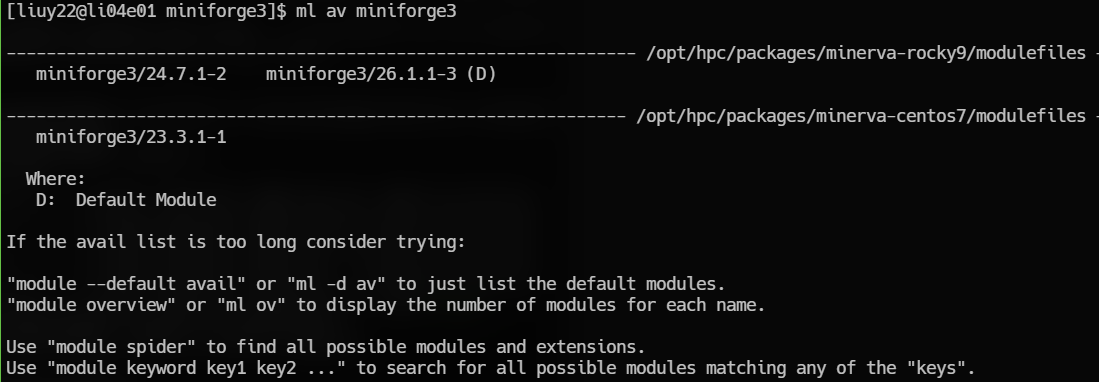
- Using Miniforge3
You can also create a virtual environment using Conda in miniforge3 modules. Please be familiar with official Conda user guide and our documentation for more information about using Conda.
- Using venv
venv allows you to manage separate package installations for different projects. They essentially allow you to create a “virtual” isolated Python installation and install packages into that virtual installation. When you switch projects, you can simply create a new virtual environment and not have to worry about breaking the packages installed in the other environments. It is always recommended to use a virtual environment while developing Python applications.
Python will need to be loaded in module before using venv:
$ ml python
Creation of virtual environments is done by executing the command venv:
$ python -m venv /path/to/new/virtual/env
venv will create a virtual Python installation in the “/path/to/new/virtual/env” folder.
Before you can start installing or using packages in your virtual environment, you’ll need to activate it:
$ unset PYTHONPATH
$ source /path/to/new/virtual/env/bin/activate
Activating a virtual environment will put the virtual environment-specific python and pip executables into your shell’s PATH.
You can confirm you’re in the virtual environment by checking the location of your Python interpreter:
$ which python
It should be in the env directory:
/path/to/new/virtual/env/bin/python
The name of the virtual environment will also show in front of your username in the prompt:
(env) [user_name@li04e01 ~]$
As long as your virtual environment is activated, you can use pip for package installation and pip will install packages into that specific environment by default. You’ll also be able to import and use packages in your Python application.
If you want to switch projects or otherwise leave your virtual environment, simply run:
$ deactivate
If you want to re-enter the virtual environment just follow the same instructions above about activating a virtual environment. There’s no need to re-create the virtual environment.
- Using pip
Pip is the package installer for Python. You can use it to install packages from the Python Package Index
and other indexes.
Python will need to be loaded in module before using pip:
$ ml python
The syntax of installing a single Python package is:
$ pip install --user package_name==version
For example,
$ pip install --user numpy==1.21.6
Packages will be installed in:
~/.local/lib/python_version/site-packages/
For example, for Python 3.12.5, the path is:
~/.local/lib/python3.12/site-packages/
Then, prepend the package path and bin path to PYTHONPATH and PATH environment variables:
$ export PYTHONPATH=~/.local/lib/python_version/site-packages/:$PYTHONPATH
>>> $ export PATH=~/.local/bin/:$PATH
You should be able to use the new package now.
$ python
>>> import numpy
>>> numpy.__version__
'1.21.6'
You can also install packages to a specific location by adding the –prefix:
$ pip install --prefix=/path/to/folder package_name==version
You will also need to prepend the paths as shown above:
$ export PATH=/path/to/folder/bin/:$PATH
$ export PYTHONPATH=/path/to/folder/lib/python_version/site-packages/:$PYTHONPATH
Jupyter Notebook
Jupyter notebooks (formerly iPython notebooks) is an interactive computational environment, in which you can code interactively in Python from a web browser with support for equation editing, code execution, rich text, mathematics, inline plotting, rich media etc.
On the Minerva cluster, you can access the Jupyter notebook running on compute nodes via port forwarding (details refer to here). You can run step-by-step commands to start a Jupyter notebook running from Minerva compute nodes and access it at your local web browser. We also provided in-house wrappers/tools to access the Jupyter notebook via one simple command line such as “minerva-jupyter-module-web.sh”.
With those tools, Jupyter notebook servers run on the Minerva compute nodes as LSF jobs with dedicated resources. You can request the needed resources for your Jupyter interactive work as you do in other LSF batch jobs. It is recommended that the Jupyter notebook is used only for code development and testing on smaller samples. For computationally intensive or long running tasks, the bulk computation should be performed in Python scripts submitted as non-interactive batch jobs, if possible.
Table 1 summary of the Jupyter Notebook wrapper
| minerva-jupyter-module-web.sh | |
| Access modules on Minerva | Yes |
| Using singularity image | No |
| Support GPU node | Yes |
| Python versions | By default, python/3.12.5; You can load other python version and other modules needed for your Jupter Notebook by -mm option |
| Others | For users who want to access Minerva modules. |
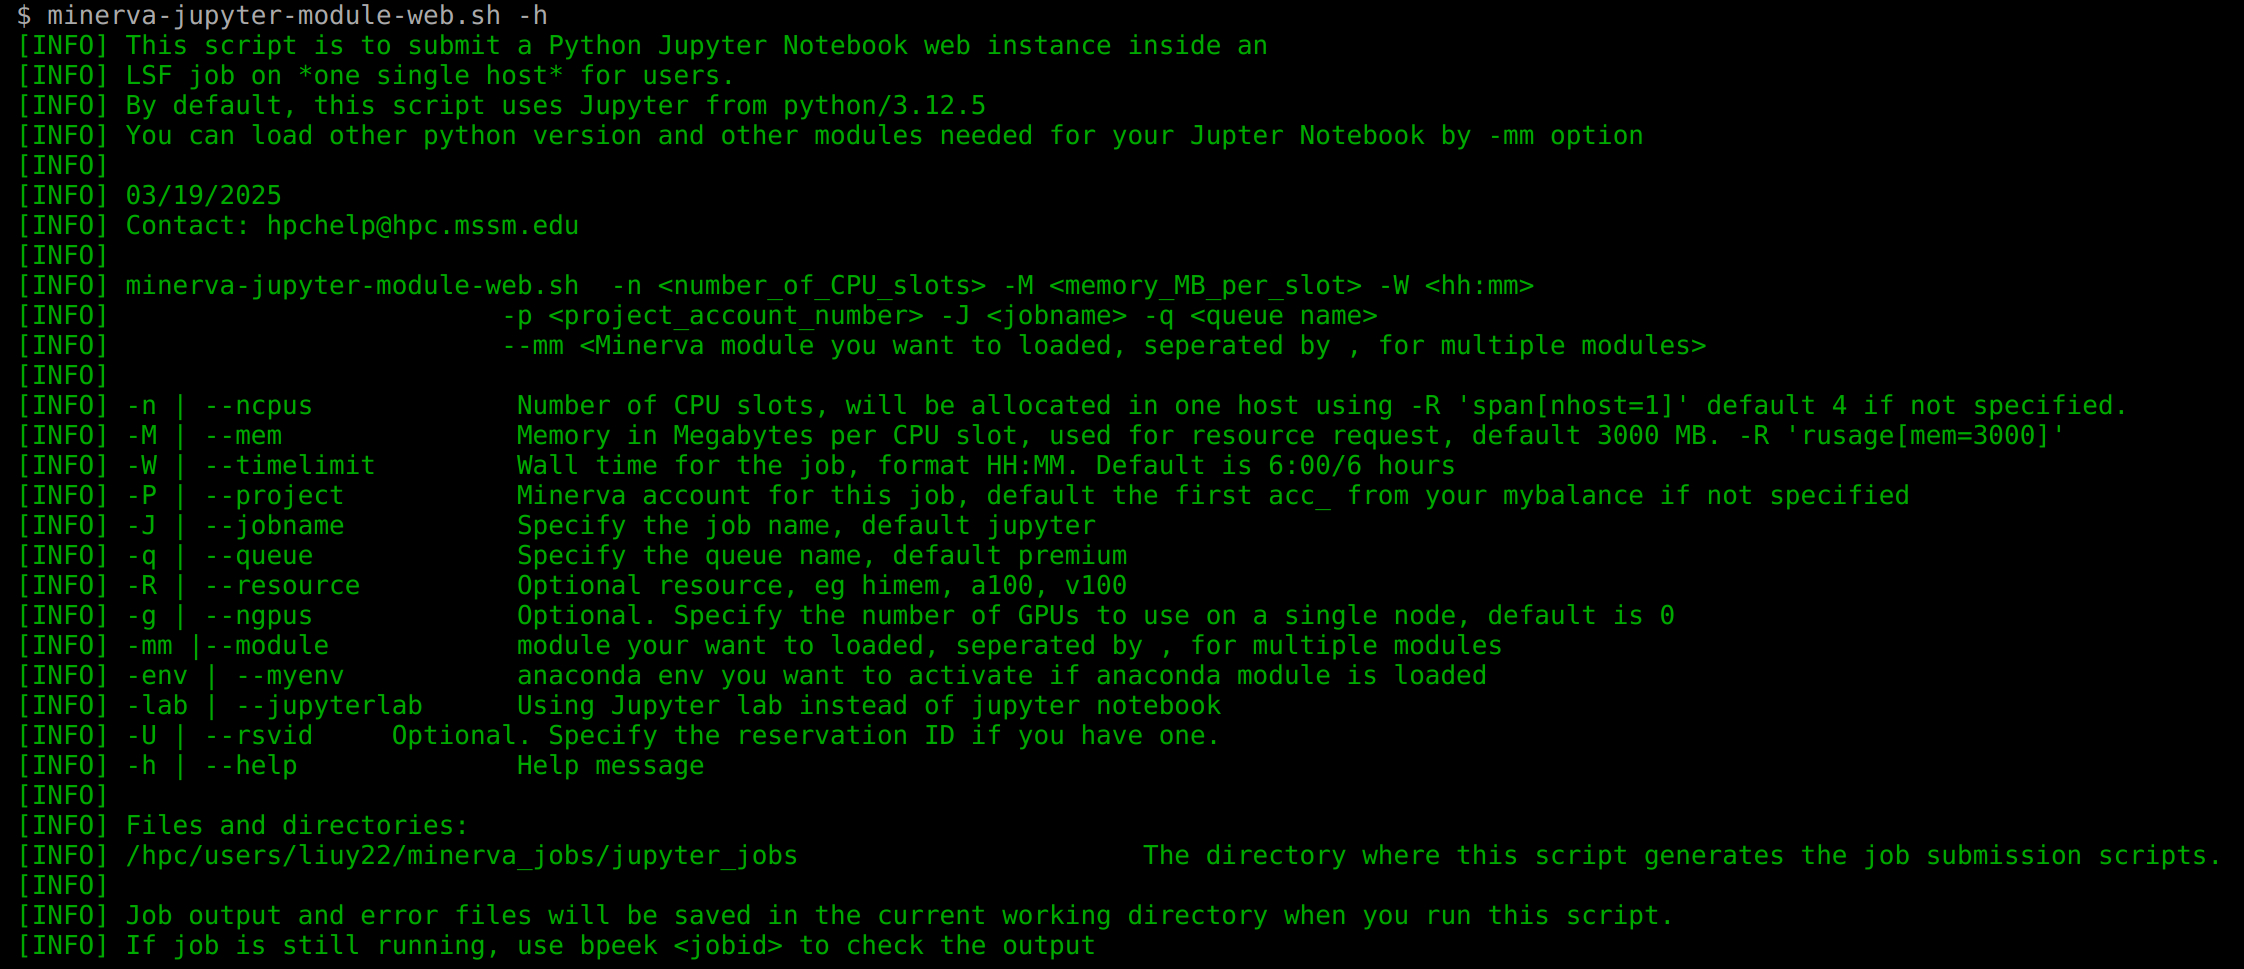
Option: minerva-jupyter-module-web.sh
One simple command to get interactive web sessions in a Minerva LSF job (Available on login nodes only). You can check the script at /usr/local/bin/minerva-jupyter-module-web.sh.
Usage:
For example, to start jupyter notebook web session with python/3.12.5, on the login nodes, run commands
minerva-jupyter-module-web.sh(using python/3.12.5) with default resource configuration and URL to access it.
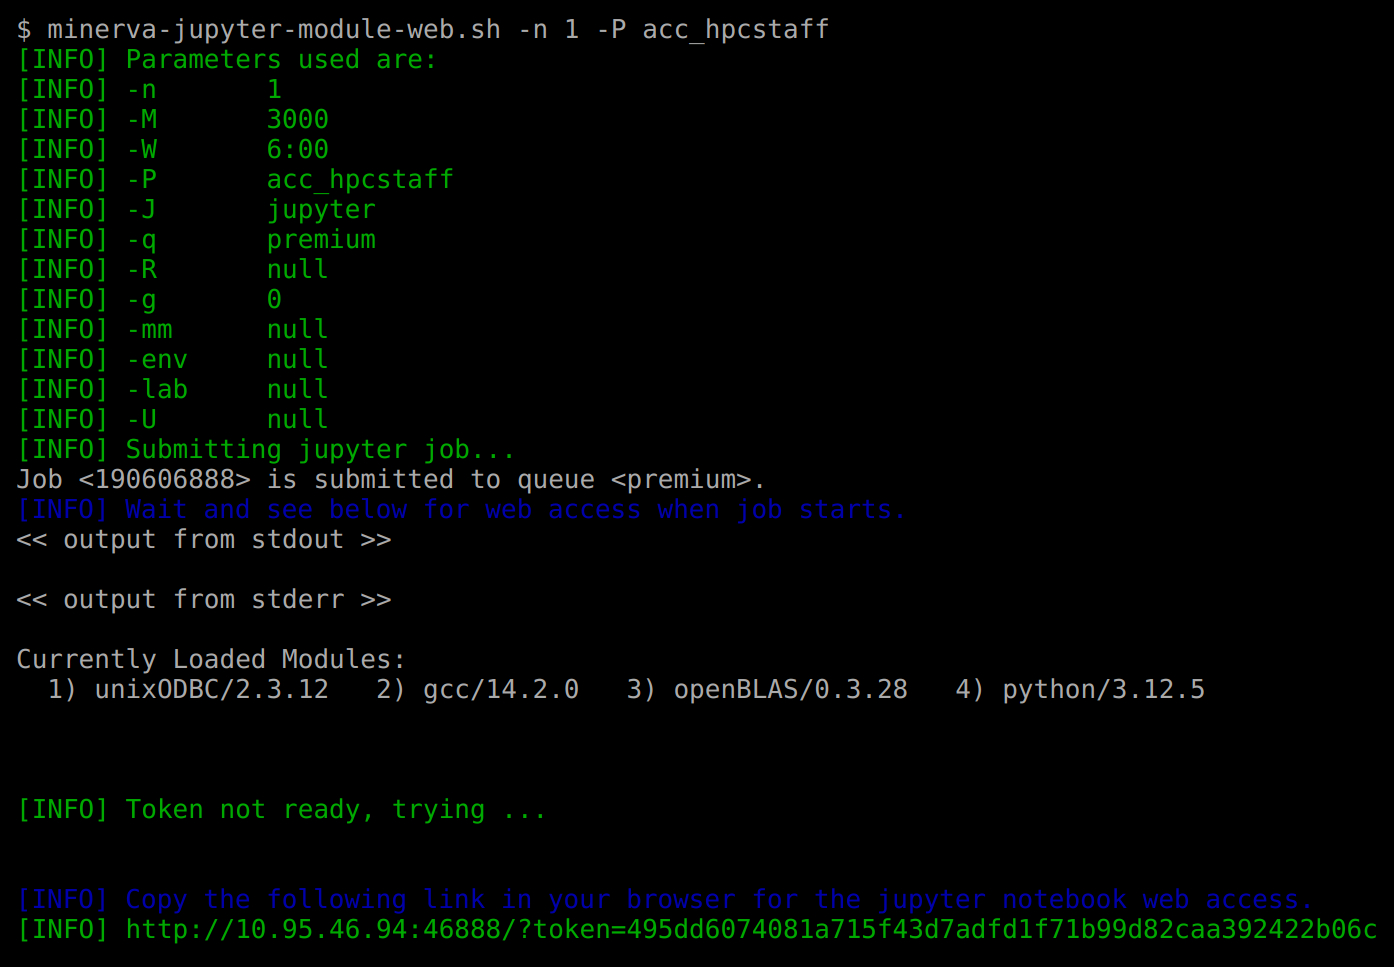
Copy the url and paste it in your browser to access the Jupyter Notebook web session. Note: You can load the modules required for your Jupyter Notebook using the -mm/--module option. If you specify an Miniforge3 module with -mm/--module, you can also load your Conda environment using the -env/--myenv option. However, make sure that Jupyter is installed within this Conda environment.
Please see the --help option for help messages containing resource requests and installing packages.
Submit Jupyter notebook as a batch job
The Jupyter command, which is available from the python installation (ml python), comes with a very versatile command jupyter-nbconvert. With this command you can convert your notebook to python, html, pdf and execute our notebook in batch or on the command line. For all the options:
jupyter-nbconvert –help.To run a notebook from the command line:
jupyter-nbconvert --to notebook --ExecutePreprocessor.timeout=-1 --execute myfile.ipynb
To run this in batch, just wrap it in a shell script and submit it using LSF. If you want the results to be part of the notebook, use the –inplace option.
You may also just want to convert the notebook to straight python:
jupyter nbconvert myfile.ipynb --to python